Operator setup
Installing requirements + venv
Configuration variables explained
Overview
There is a number of prerequisites that have to be met before you can perform an RCL job and use RES_PROCESSOR.
The steps that you need to take to set up your system are described below and the good news is - you only have to do it once.
Once you've set up your machine to work with RES_PROCESSOR, you can just come back and process additional packs.
The following will be necessary, however are not covered in this document and it is assumed you've sorted all of this out:
-
VPN access to the memoQ server (you can check if you have this by pinging memoq.reddotranslations.pl);
-
Azure git repo link for downloading the RES_PROCESSOR code package (also user and password - to be provided by IT);
-
RES_PROCESSOR should be run from an Admin account on Windows to avoid file access privileges errors (to be set up by IT).
-
access to the Plunet ARCHIVE folder on the Plunet production VM (to be provided by IT).
Necessary software
In order to perform RCL jobs on your local machine, you will need to download and install the following software:
-
Python 3.9.13 - the programming language environment in which RES_PROCESSOR was created (Download Python 3.9.13.exe)
-
PyCharm Community Edition - an Integrated Development Environment (IDE) that will let you easily start RES_PROCESSOR, maintain it and review results (PyCharm Community Edition .exe)
-
Git for Windows - the software to download and use code repositories, which store the code and files for RES_PROCESSOR (Git for Windows 2.40.1 exe download)
You can install all this software with the default options, controlling installation directory if necessary.
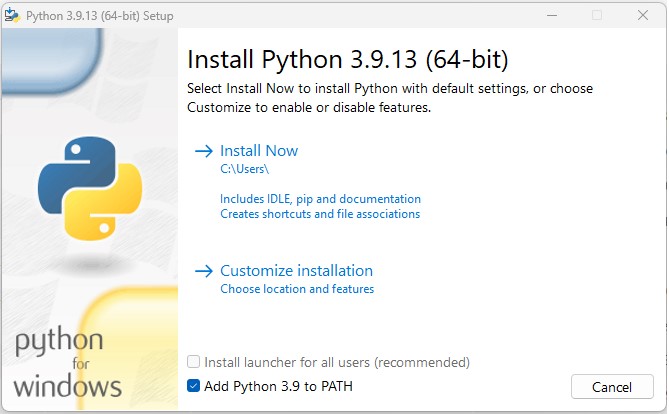
For Python, please make sure to mark these options upon installation to facilitate using Python:
Local folder structure
RES_PROCESSOR operates on your local Windows system and needs two directories to be created:
-
A directory to store the RES_PROCESSOR code files (repository) - we recommend as little nesting as possible here (e.g. D:\RES_PROCESSOR).
-
A directory with a pre-determined set of subdirectories that will store the resource files you will be processing. The structure of this should be as follows:
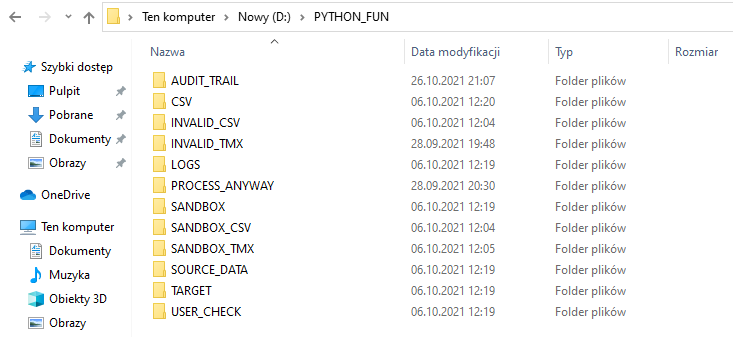
These folders are name- and case-sensitive, so be careful when creating them. To facilitate this, the Git repository contains a .bat file that will create these folders automatically.
Just need to copy the file to the main directory where sub-folders are to be created and double-click it. If you want to sort this out before the repository, the files is available here.
Cloning the Azure RES_PROCESSOR repository using Git Bash
In order to use RES_PROCESSOR, you need to download the code that does the magic. You can do this by "cloning" a repository from an online source to your local machine.
Before doing this, create a local folder that will store the code; for the purposes of this document "D:\test" is used, but any folder is acceptable, as long as it's not nested too deep.
This is how you can clone an Azure repository using Git Bash:
-
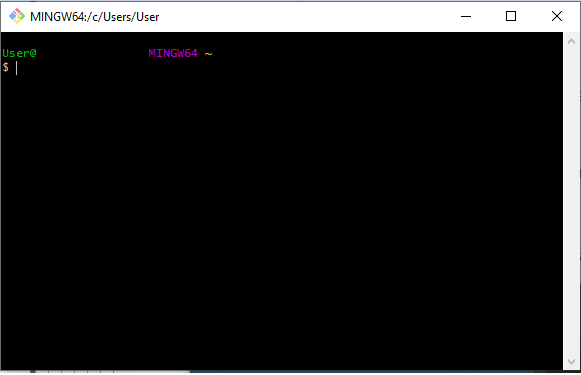
Search for the Git Bash software in Windows and start it:
-
A command prompt similar to the below will appear (including your user name):
-
In order to clone the repository, you will need to have a link that IT will provide. The format of the link will be similar to: https://****@dev.azure.com/://****/Reddo/_git/Reddo.
You will also need a username and password for the repository, also to be provided by IT.
-
Navigate to the target directory by typing "cd" followed by the full Linxu absolute path to your destination. In this case, it would be "/d/test":
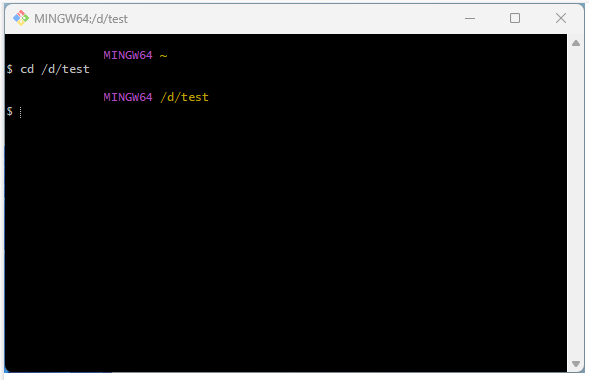
Notice that the current folder is marked in yellow above the prompt.
-
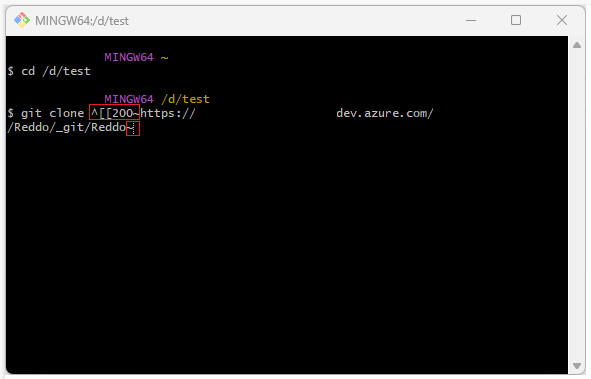
Then use the "git clone" command followed by the repository HTTPS address. Azure offers two forms of repository authentication:
-
via HTTPS based on username and password (our case)
-
via SSH based on a key pair
Note that Git Bash will not accept Ctrl+V, in order to paste the repository HTTPS address, you need to right-click the Git Bash window and select "Paste".
Also note that when copying the HTTPS address directly from Azure, there may be rogue trailing and closing characters that you will need to delete, as below.
If you are using a text string provided by IT, most probably it will not include these rogue character.
-
-
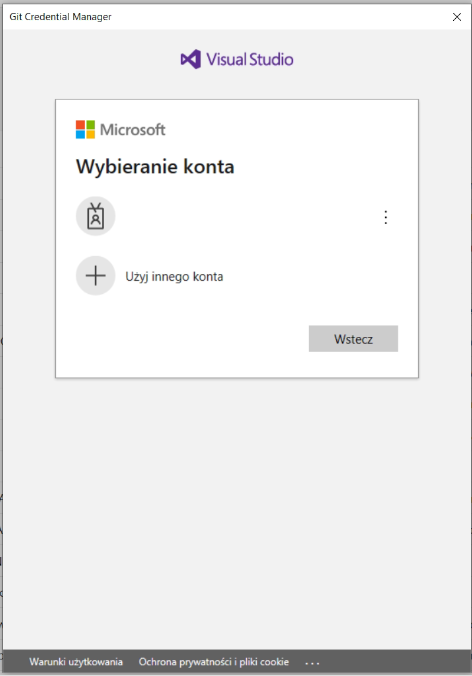
The Git Credential Manager window will appear, where you need to select another account for logging in:
-
In the next window, enter the login details received from IT. If you have any trouble logging in, reach out to IT.
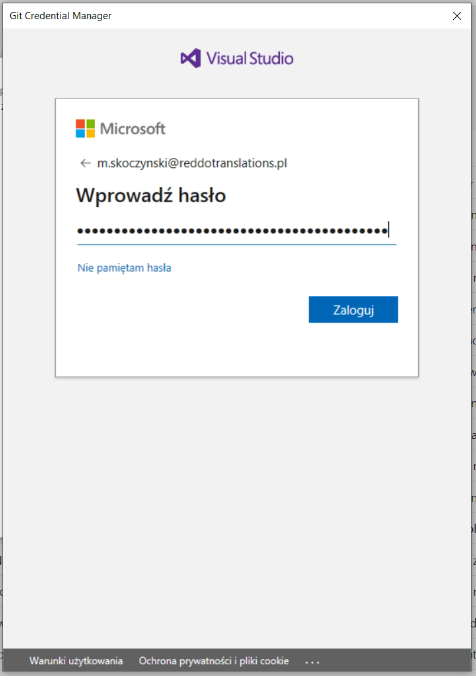
-
Once cloning is complete, the Git Bash window should confirm this:
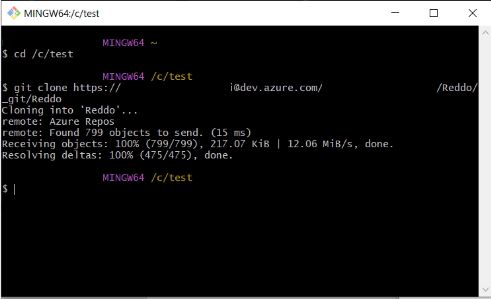
-
To make sure everything is OK, open the Windows Explorer and navigate to the appropriate folder to confirm that it contains the necessary files:
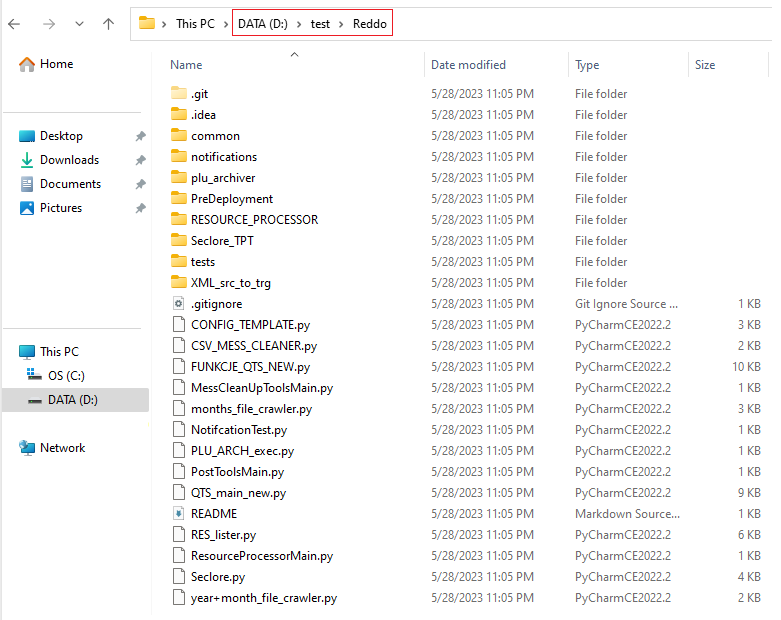
-
The code is there, now we can move over to configuring the Python environment.
Setting up Python (interpreter, virtual environment)
Predeployment script - installing requirements + VENV
In order to run RES_PROCESSOR, we need to configure the Python environment on your local machine. In order to facilitate this, we have prepared a batch file that will handle all the preparations.
This file sits under d:\test\Reddo\PreDeployment\predeployment.bat - please note that paths are hard-coded into the batch file, therefore it has to be started exactly from this directory.
This batch file will handle the following preparations:
-
prepare a virtual environment for Python (if you'd like to know what it is and why you need this, check out this Real Python tutorial "Why do you need virtual environments").
-
install and update PIP for managing Python packages (again, if you'd like to know more, check out this Real Python tutorial "A Beginner's Guide to PIP").
-
install all the Python packages included in the requirements.txt file - this includes all the modules that are necessary for RES_PROCESSOR to operate.
Successful output of the predeployment.bat file should look like this:
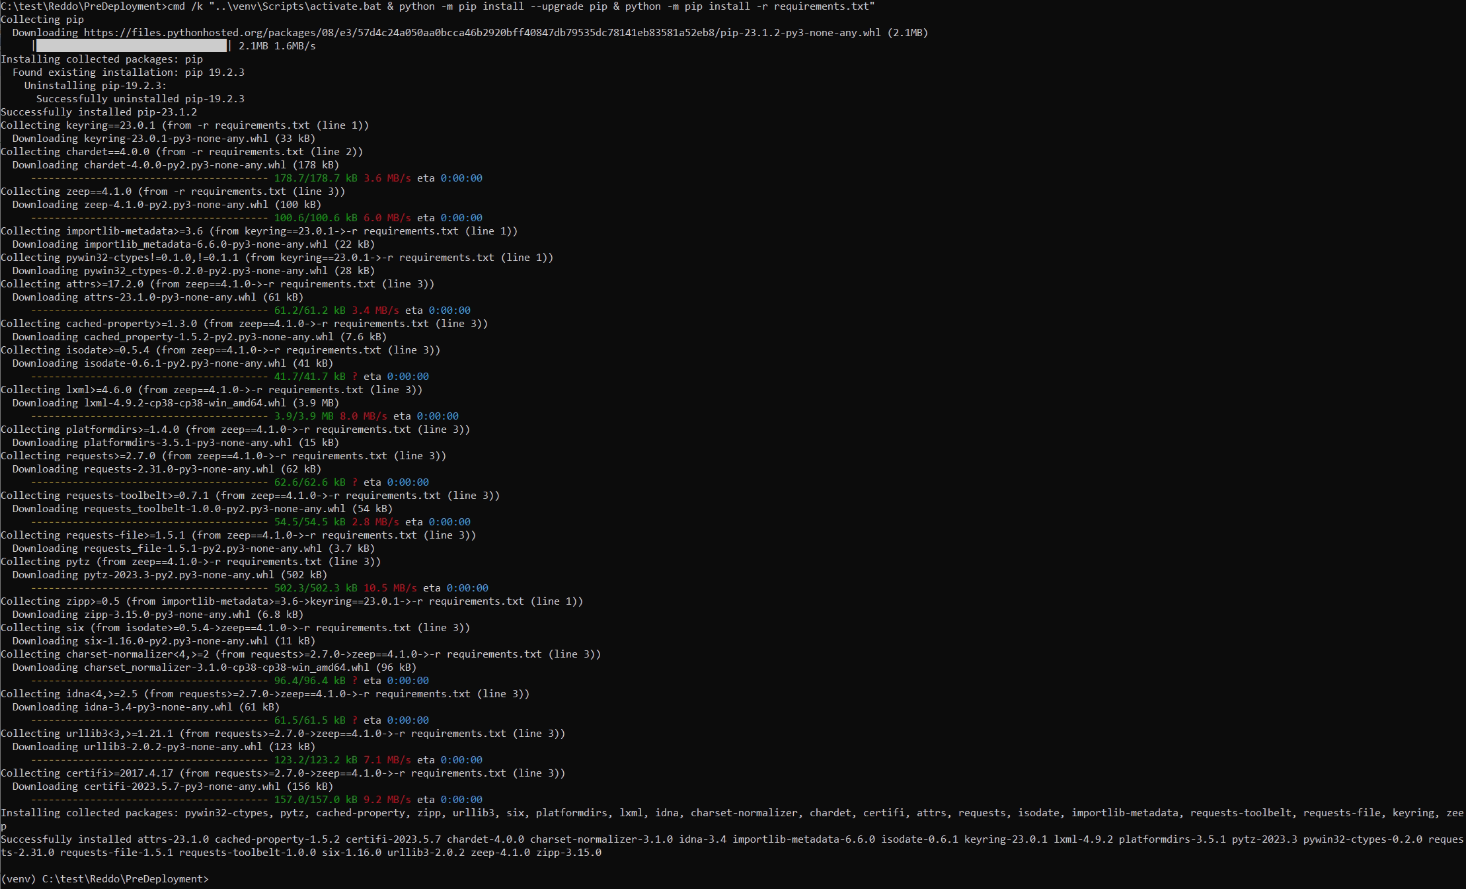
The Python environment is ready, now it's time to configure PyCharm, the Integrated Development Environment that we'll use to run RES_PROCESSOR.
Python interpreter setup in PyCharm
Open PyCharm, then navigate to File and select Open - find the Reddo repository and open it in PyCharm.
If you are prompted to trust the project, confirm and open the project in the same window.
Then navigate to File -> Settings and then under "Project:Reddo" open the "Python interpreter" settings:
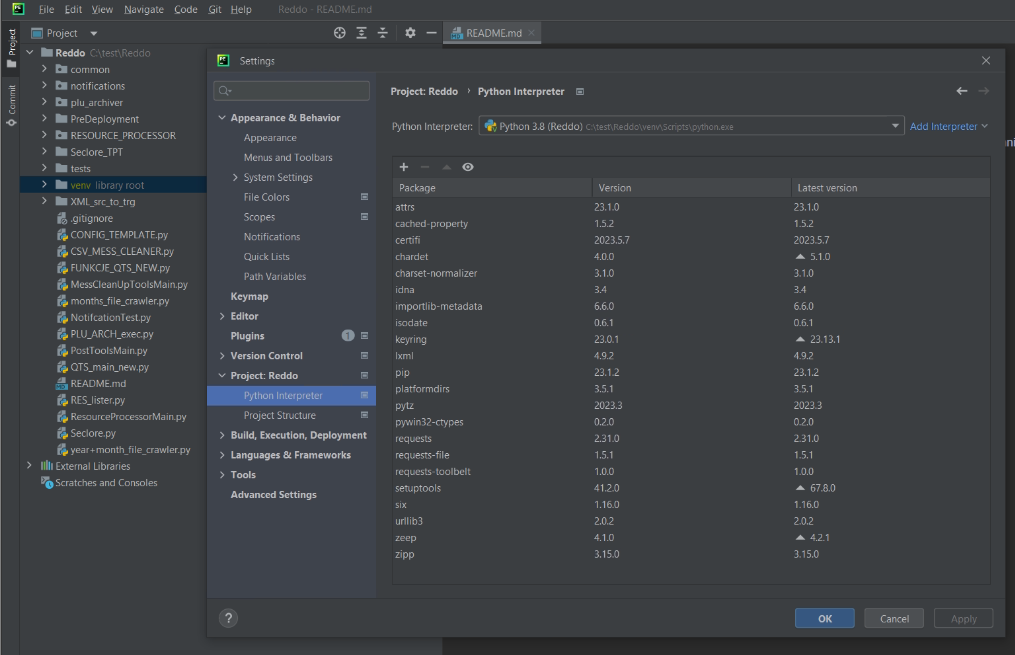
The interpreter for this project should sit under the RES_PROCESSOR repository, so if your PyCharm shows a greent tick in the "Python Interpreter" field and indicates the path "D:\test\Reddo\venv\Scripts\python.exe, you're all set. If it does not, select the "Add interpreter" option and select "local interpteter.
In this window, select the "Existing" option and navigate to the path mentioned above:
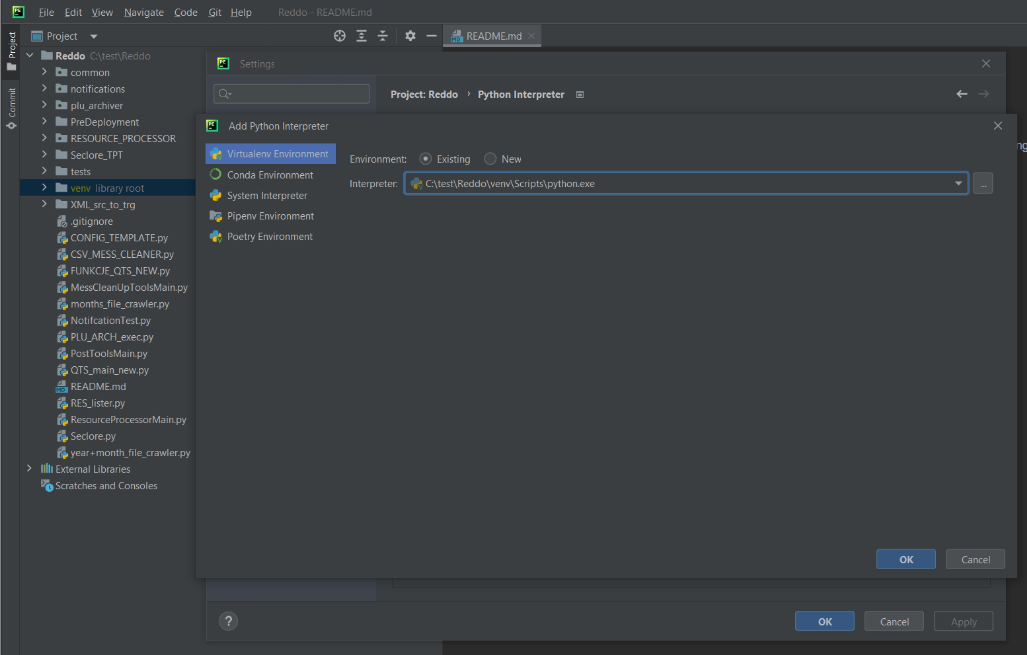
Confirm both windows with the OK button. We're almost done, there's one more setup step and we can start processing resources.
Keyring setup in PyCharm to manage passwords
Again, to facilitate this initial configuration, we have prepared a script that will setup the last element necessary.
This is a Python module called "keyring", which is used to securely store passwords and other credentials.
You will need this to store the e-mail user and password for sending log messages and log files from RES_PROCESSOR.
In the following section, you will learn how to set up the sender and recipient e-mail adresses for this, but first save your password using the keyring setup script.
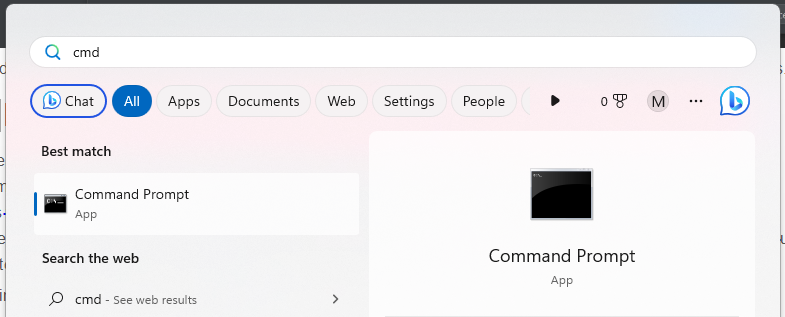
1. Open an elevated command prompt (elevated = with Windows admin user rights):
-
click the Windows start button and type "cmd"
-
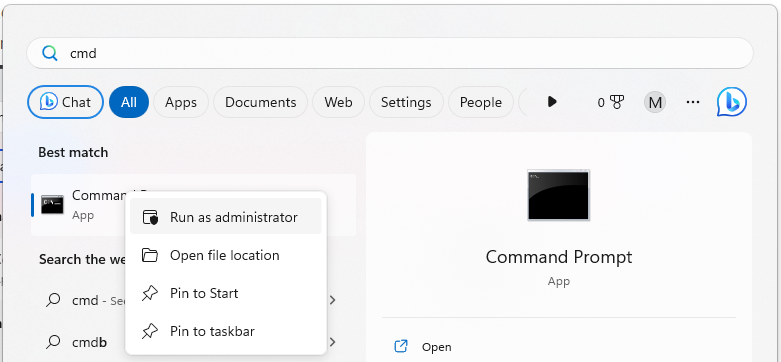
right-click on the Command Prompt app and select "Run as Administrator"
-
-
Navigate to the project directory and the folder with the keyring setup script by inputting the following commands:
-
Once in the PreDeployment folder, you will need to start Python and run the "keyring_setup.py" script.
To do this, invoke the "keyring.set_password(#1, #2, #3)" command, which takes 3 arguments:#1 - server name
#2 - user name
#3 - password
-
Editing the CONFIG.py file
CONFIG_TEMPLATE.py renaming
Once all the setup is complete, the last step is to edit the configuration file for RES_PROCESSOR to make it work on your local machine.
For security and for practical reasons, the config file that you receive in the Git repository is a placeholder that needs to be completed with certain information.
Before you do that, you need to rename the files in PyCharm:
-
Open PyCharm and then open the relevant project.
-
Navigate to the project files by clicking the Project tab in the upper left corner of the PyCharm interface screen (vertical text).
-
Navigate throught the project files and find "CONFIG_TEMPLATE.py".
-
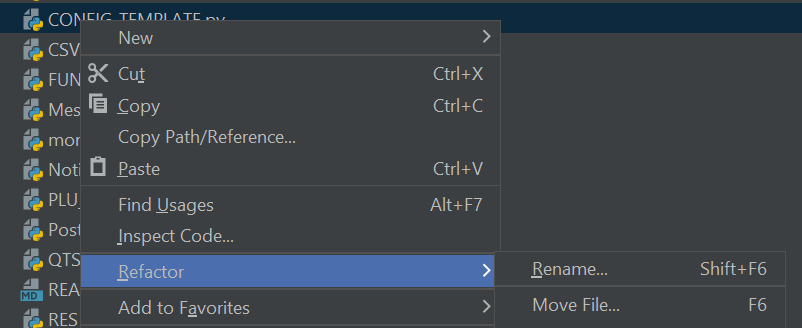
Right click on this file and select Refactor->Rename to change its name:
-
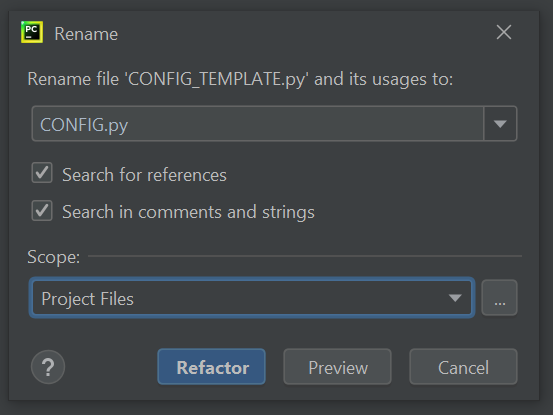
In the dialogue that will appear, you can leave all options as per default, just change the file name from "CONFIG_TEMPLATE.py" to "CONFIG.py" and then click "Refactor".
-
Your file is renamed.
Configuration variables explained
Now it's time to edit the configuration variables. Most of them are paths that need to point to your local filesystem path that you've created a moment ago.
The configuration also includes credentials for the e-mail account (server name, sender name, recipient name) to send out log files. The password for this account was handled using keyring above.
There is one flag (YES/TRUE =! NO/FALSE setting) in the file that will be discussed below.
ROOT_PATH = this is the main path for your resources files, under which you created all the sub-folders
CSV_CONFIG_PATH = this is the path that houses the CVS config file from Plunet, provided by the PM
PROCESS_ANYWAY_PATH = this is the path that houses files that will be processed by PLU_ARCHIVER regardless of special cases (e.g. orders for which MemoQ was not used)
USER_CHECK_PATH = this is the path that houses files that you will need to review manually because of some special cases and possibly liaise with the PM
SANDBOX_PATH = this is the path that houses TMX/CVS files temporarily for further processing; if there are any files left here after a run, something went wrong
AUDIT_PATH = this is the path that houses files resulting from the RES_PROCESSOR run for audit trail purposes and archiving
AUDIT_PATH_TMX = this is the path that houses TMX files from the run - individual project resources and aggregate TMX
AUDIT_PATH_CSV = this is the path that houses CSV files from the run - individual project resources and aggregate CSV
SANDBOX_TMX_PATH = this is the path that houses temporary TMX files for further processing
SANDBOX_CSV_PATH = this is the path that houses temporary CSV files for further processing
INVALID_TMX_PATH = this is the path that houses any TMX files that have errors and need to be reviewed manually (most usually these are incorrect language pair/codes)
INVALID_CLIENT_TMX_PATH = this is the path that houses any TMX files for client resources that have errors and need to be reviewed manually (most usually these are incorrect language pair/codes)
INVALID_CSV_PATH = this is the path that houses any CSV files that have errors and need to be reviewed manually (multiple reasons)
SOURCE_PATH = this is the path that houses the source orders folders to be processed
MULTI_PATH = this is the path that houses multilingual projects that are not processed through RES_PROCESSOR and need to be handled manually
ARCHIVE_TARGET_PATH = this is the path that houses orders archived in ZIP files for archiving purposes
LOGS_PATH = this is the path that houses the log files from RES_PROCESSOR
LOGGER_FILENAME = the name of the log file from RES_PROCESSOR
SERVER_NAME = server name for RES_PROCESSOR e-mail notifications
SENDER_NAME = sender e-mail address/user for RES_PROCESSOR e-mail notifications
RECIPIENT_NAME = recipient e-mail address for RES_PROCESSOR e-mail notifications
SPACE_CONDITION = this variable governs the target location storage space check for archiving orders in ZIP files, usually does not need to be modified
CLIENT_TM_DO_NOT_CLEAN = this TRUE/FALSE flag governs whether dedicated client resources are created; you can modify it to FALSE if processing large batches that do not include clients who have their own resources created

